Showing posts with label Crafts. Show all posts
Tuesday, December 24, 2013
Hello Christmas. You're looking lovely…..
I just wanted to share some Christmas cheer with everyone today. These are my Christmas globes that I promised to share. I made a bunch more. These were my favorites. It is a Charlie Brown Christmas:)
-Emily
Monday, April 29, 2013
Drab to Fab!
I finally got some fake TOMS:p
(Is it strange to be so excited over knock-offs?)
So of course I wound up with 2 shoe boxes. I can never throw them away! They can be used to keep me organized and store things. This time I decided to dress them up!
Here are my boxes.I chose my fabric...I stuck with an old flower sheet and this black and white fabric I didn't know we had!
I laid the top of the box out on the fabric and cut enough all the way around to sew to the inside of the box.
I did the same with the bottom. Then I ironed them.
I hot glued the edges to the insides of the box.
I wrapped the edges like you would wrapping paper on a gift.
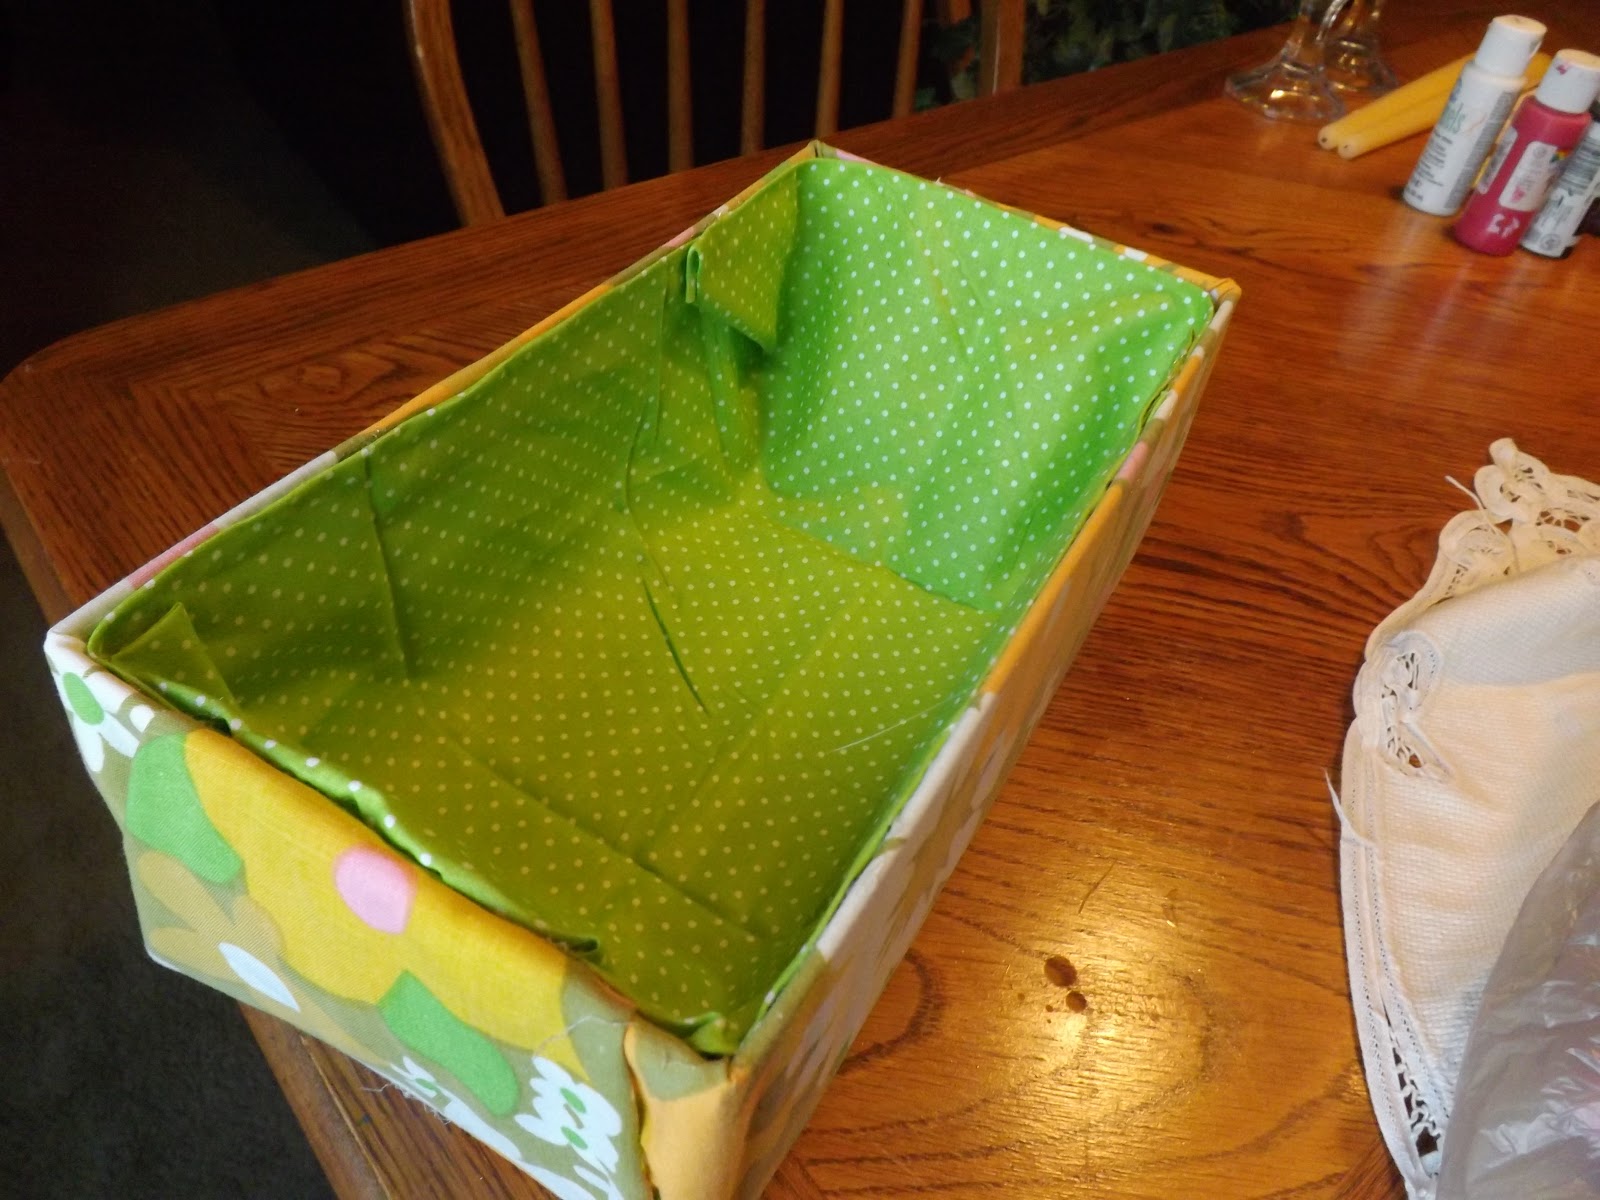
So I had my box! The inside looked rough with all my glueing. Time for a lining!
I measured the fabric,cut it out, and then glued the folded ends together.
I did the same thing with the smaller box.
My finished product:)
So fun! I will do this with all my shoe boxes from now on!
Have a great day!
-Emily
Saturday, February 9, 2013
Ways to get organized-Part 1: DIY $5.00 makeup displays
HI:D
So I have been trying to organize my room lately. I of course went straight to Pinterest! I found some really cute ideas! I got inspired (as always) and decided to get crafty. I didn't want to spend a lot of money so I headed to the dollar store to get all the things I needed to make these cute displays:)
(Please excuse the picture quality)
I bought all of this at Dollar Tree. Four glass candle jars,a candle stick holder,and some colorful beads.
I filled up the round glasses with the beads and stuck my brushes in it.....
I hot glued on of my square glasses to the candle stick holder....
I wanted one to be higher than the other;) Then I filled them with beads.
I made the labels with a paper bag and my stamp kit.
Very simple and very cheap! This project only cost me $5.00 to make!
Have a great day!
-Emily<3
So I have been trying to organize my room lately. I of course went straight to Pinterest! I found some really cute ideas! I got inspired (as always) and decided to get crafty. I didn't want to spend a lot of money so I headed to the dollar store to get all the things I needed to make these cute displays:)
(Please excuse the picture quality)
I bought all of this at Dollar Tree. Four glass candle jars,a candle stick holder,and some colorful beads.
I filled up the round glasses with the beads and stuck my brushes in it.....
I hot glued on of my square glasses to the candle stick holder....
I wanted one to be higher than the other;) Then I filled them with beads.
I made the labels with a paper bag and my stamp kit.
Very simple and very cheap! This project only cost me $5.00 to make!
Have a great day!
-Emily<3
Labels:
Crafts,
Fun Stuff,
I'm Loving It,
Make-up,
Organized,
Photography,
pinterest,
Random Stuff,
SpArKlE,
Tutorials
Tuesday, December 11, 2012
Fabric Covered Letter Tutorial
So I haven't done many craft tutorials on here as of late. Mainly because I've been too busy to do any crafting! I got an opportunity this past week to fix up this wooden letter I have had for a year now.(did I just admit that??) So anyways, I knew I wanted to paint it and cover it with fabric. That's precisely what I did.
Before
My supplies.....
I mixed the colors to get this nice pastel blue color.
Painted.
I chose some fabric that we had on hand that would bring out the color that I had painted the letter.
I cut it out smaller than it was traced because I wanted to be able to see what I had painted.
I used Elmer's Craft Bond Adhesive spray to attach the fabric to the letter. Then I sealed it with the Mod Podge spray.
I let it dry and tada! My initial! I think I will put it on my wall,but I am not quite sure yet;)
-Emily<3
Before
My supplies.....
I mixed the colors to get this nice pastel blue color.
Painted.
I chose some fabric that we had on hand that would bring out the color that I had painted the letter.
I cut it out smaller than it was traced because I wanted to be able to see what I had painted.
I used Elmer's Craft Bond Adhesive spray to attach the fabric to the letter. Then I sealed it with the Mod Podge spray.
I let it dry and tada! My initial! I think I will put it on my wall,but I am not quite sure yet;)
-Emily<3
Labels:
Crafts,
Fun Stuff,
I'm Loving It,
life lately,
Photography,
Random Stuff,
Tutorials,
Weekly Tidbits
Christmas Bazaar
Just a few pictures from our teen fundraiser Christmas Bazaar. We had it at our local community building. We have one every year. This year me and Aby had a table(really two) that we shared to sell our crafts. The pic above is of the "Gifts in a Jar" my mother and I made.
Flower pins,headbands,bracelets.......
Christmas ornaments.....
bottle cap necklaces....
candles......
jewelry.....
and fun!!!!!!
-Emily<3
Flower pins,headbands,bracelets.......
Christmas ornaments.....
bottle cap necklaces....
friends.....
flavorings.....candles......
jewelry.....
and fun!!!!!!
-Emily<3
Labels:
Christmas,
church,
Crafts,
Friendship,
Fun Stuff,
Holiday Fun,
I'm Loving It,
Jewelry,
life lately,
Photography,
Random Stuff
Tuesday, July 24, 2012
I glitzed my ipod case!!
I love sparkly things! If you visit my Pintrest you'll see! So I kind of got bored with my Jelly Bean ipod case,so I decided to do something about it. I choose my colors for the sparkle and took off!
Sparkled Ipod Case
So pretty!This is the front of the case....
and here is the back.
I painted my case purple and covered it with a polyurethane(you don't have to use this step) I wanted the case to match my stones.
Then I took the glue gun and attached my gems. Alternate colors;)
This was the finished results. Cute!
Have a great day!
-Emily<3
Subscribe to:
Posts (Atom)